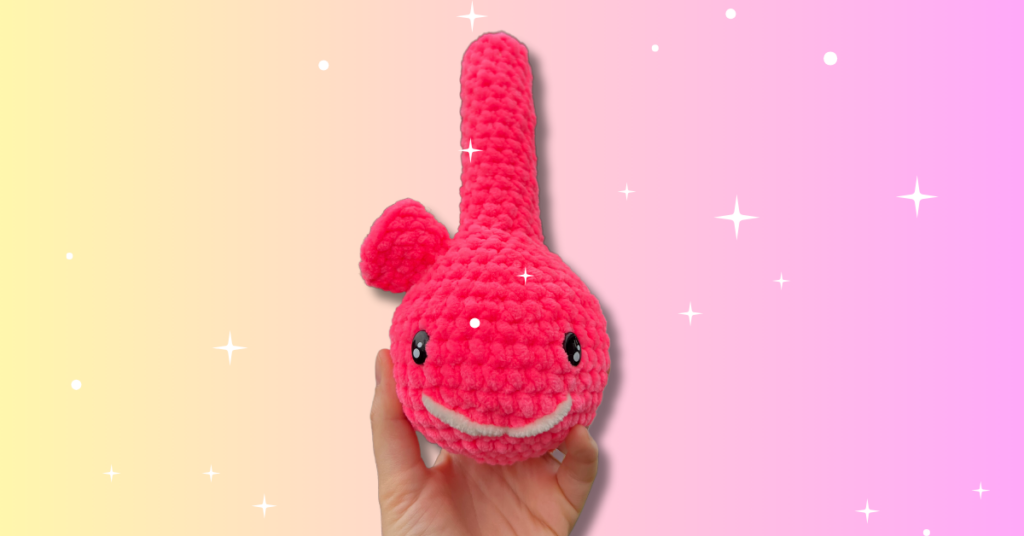
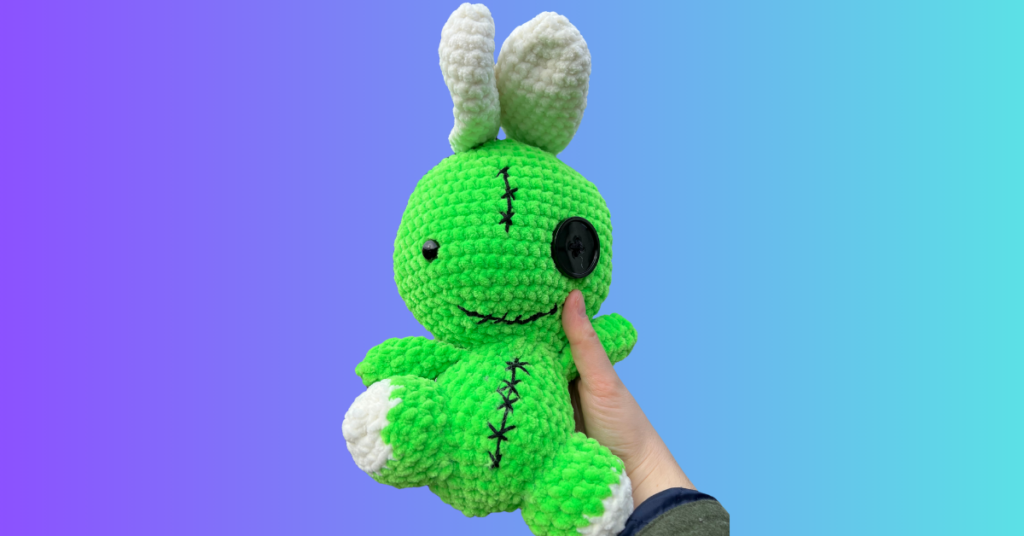
Have you ever felt the thrill of watching a bundle of yarn transform into a plushie friend? If so, you’re in for a treat with my latest amigurumi pattern!
When I first started crocheting I naturally gravitated towards amigurumi patterns. I honestly didn’t know where to start and owe a lot to free amigurumi patterns that I found online. This is why I’m dedicated to paying what I’ve learned forward and share free amigurumi patterns here on the Amigurumi Freak website.
Learning the craft of amigurumi stuffed toys can be helped a ton by beginner friendly patterns with detailed instructions and minimal sewing. Because of this I’ve made my debut amigurumi pattern as a simple, three part plushie bong.
Introducing our Free Amigurumi Pattern: Plushie Bong—a project designed for the beginner crafter who knows their way around stitching parts together and basic crochet stitches. This pattern is not just any pattern; it’s a gateway to creating a unique companion with your own hands. Whether you’re a seasoned amigurumi enthusiast or looking to challenge your skills further, this free crochet pattern is your next step.
Are you ready to embark on this crochet adventure? Let’s unravel the creativity together, one stitch at a time!
What to Know Before Getting Started Crocheting
Below are the materials and basic stitches you’ll need to know to successfully complete this amigurumi pattern. For those that are beginners, I highly encourage you to gather materials similar to the ones listed below.
If you are a beginner, I recommend practicing counting your stitches on a scrap piece of yarn before starting. Getting used to chunky, chenille yarn can be tough as stitches aren’t very visible at first.
Amigurumi Pattern Abbreviations
This pattern is written in US terms:
- MR: Magic Ring
- SC: Single Crochet
- FLO: Front Loops Only
- INC: Increase
- INVDEC: Invisible decrease
- (#): Number of stitches in the round
Materials You’ll Need
Before diving into the world of crocheting, it’s essential to gather your craft supplies and select the right yarn for your project. Your yarn choice is pivotal, as it influences the materials needed. While we provide a free pattern, feel empowered to customize with your preferred yarn and materials, making your creation uniquely yours. This flexibility ensures your crochet journey is as personal and creative as the plushie you’re about to craft.
- Hook: 5mm
- Yarn: I used #6 Super Bulky Yarn
- Safety Eyes: 12mm Safety eyes, I used Kawaii eyes!
- Stuffing:Poly-Fil for stuffing
- Misc:
- Stitch markers
- Tapestry needle
- Scissors
The Pattern: Ready, Set, Crochet!
Diving into this amigurumi project is both an exciting adventure and a fantastic way to sharpen your crochet skills. Regardless of your skill level, this pattern is designed to be beginner-friendly, making it the perfect project to start or continue your crochet journey.
I encourage you to follow the pattern in the order provided to ensure a smooth crafting experience.
Get ready to feel the hazy thrill of creation as you embark on this delightful 420-friendly crochet journey, transforming yarn into a charming, stoner plushie companion.
Bong Top (Color 2)
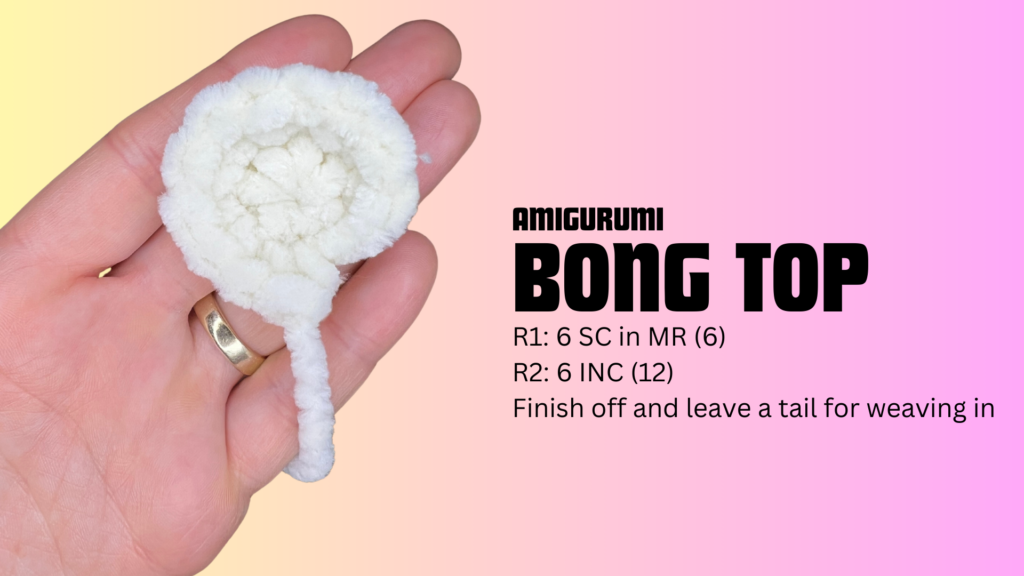
Starting with the top of our amigurumi bong is the best way to kick off this project.
The magic ring is the bread and butter of many amigurumi patterns. This small magic ring is a beginner friendly way to get your crochet muscle firing on all cylinders!
By using the magic ring method and increase stitches, you’ll create a sturdy and neat beginning. This foundational technique ensures a flat top to your crochet bong plushie.
R1: 6 SC in MR (6)
R2: 6 INC (12)
Finish off and leave a tail for weaving in
Bong Bowl (COLOR 2)
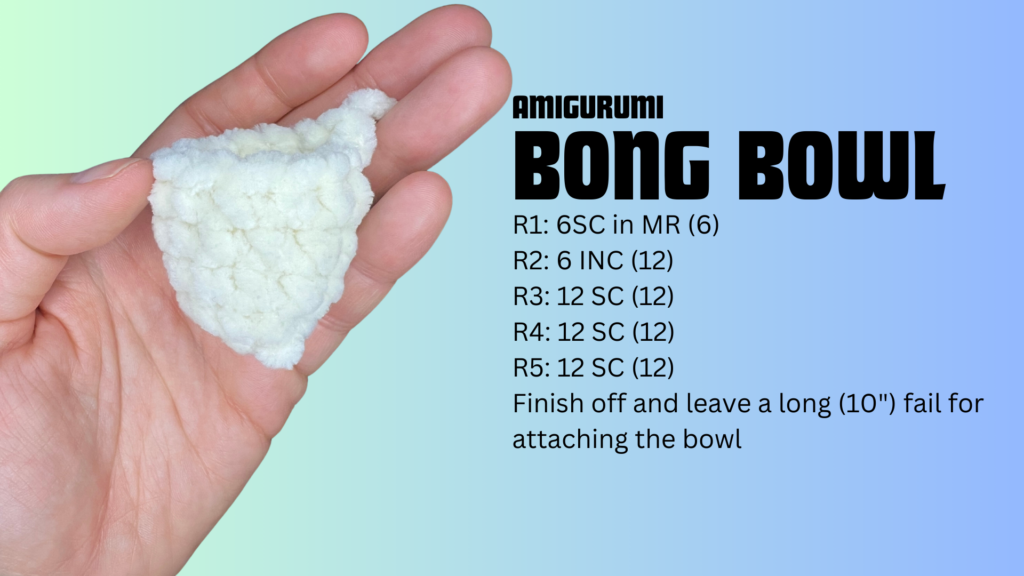
Crocheting the bowl of our amigurumi bong is a straightforward task, shaping it into a simple cone. By employing single crochet stitches and increases, this section enhances the overall design, adding depth and character to your creation. After all, would our bong be complete without a bowl? I think not.
R1: 6SC in MR (6)
R2: 6 INC (12)
R3: 12 SC (12)
R4: 12 SC (12)
R5: 12 SC (12)
Finish off and leave a long (10″) fail for attaching the bowl.
Bong Body (COLOR 1)
Embarking on the main part of our amigurumi bong is an exciting step. This is where we start to see our crocheted plushie start to come to life!
R1: 6SC in MR (6)
R2: 6 INC (12)
R3: [SC, INC] x 6 (18)
R4: [2SC, INC] x 6 (24)
R5: [3SC, INC] x 6 (30)
R6: [4SC, INC] x 6 (36)
R7-R12: 36 SC (36)
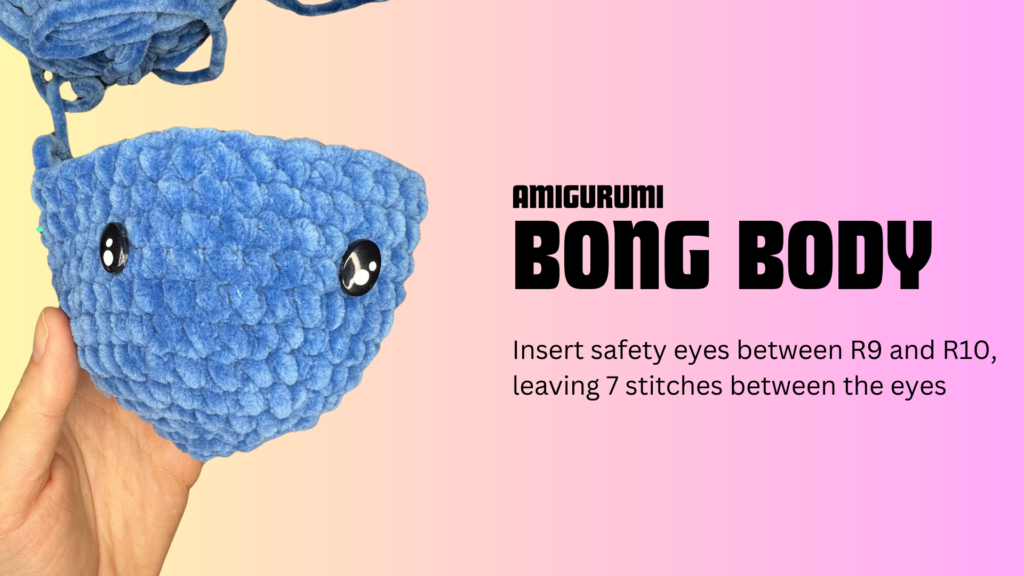
Insert safety eyes between R9 and R10, leaving 7 stitches between the eyes.
R13: [4SC, 1INVDEC] x 6 (30)
R14: [3SC, 1INVDEC] X 6 (24)
R15: [2SC, 1INVDEC] X 6 (18)
Stuff the bottom of the bong with a generous amount of Poly-Fil.
R16: [SC, 1INVDEC] X 6 (12)
R17: 12 SC FLO (12)
R18-R30: 12 SC (12)
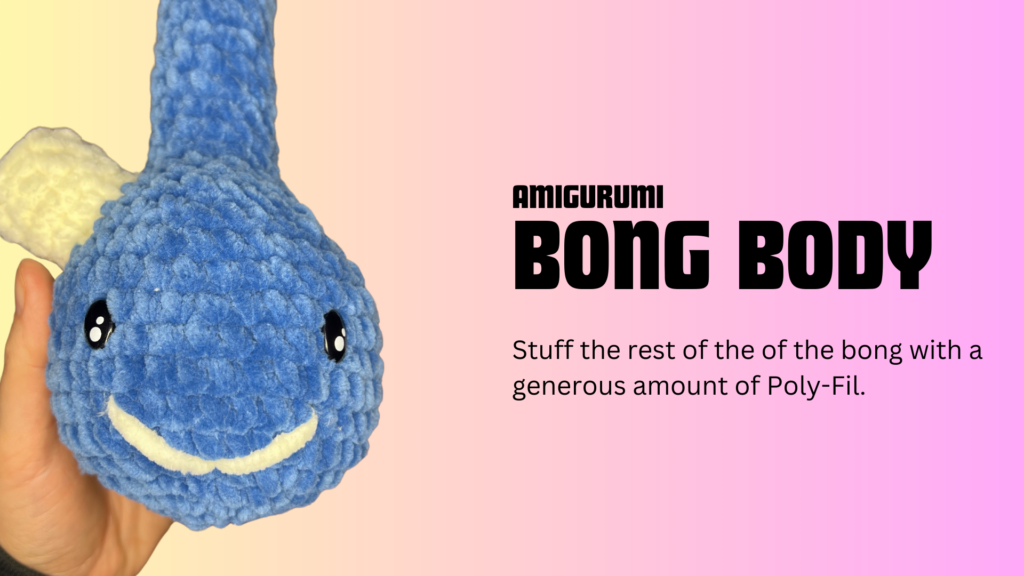
Stuff the rest of the of the bong with a generous amount of Poly-Fil.
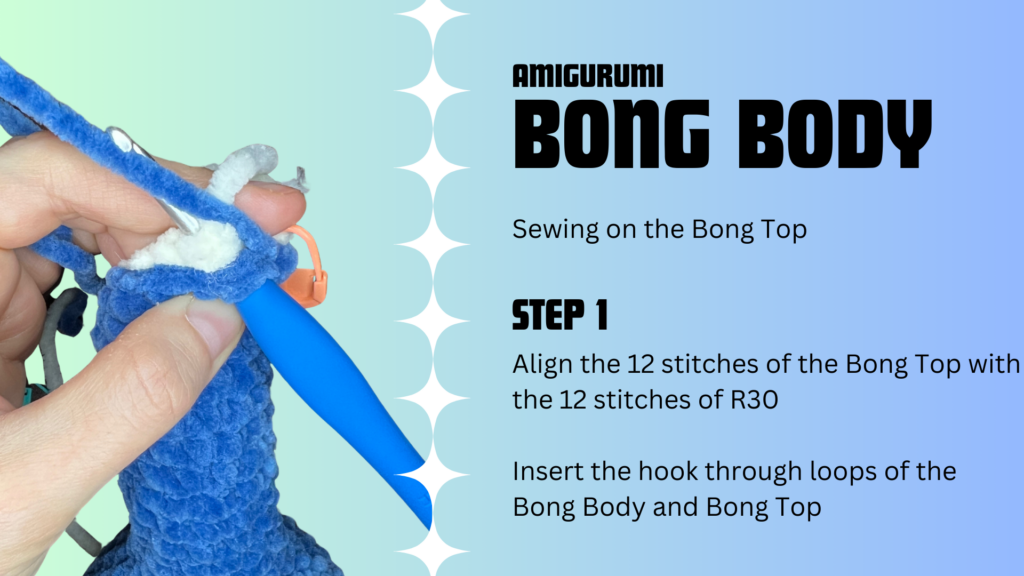
R31: Align the 12 stitches of the Bong Top with the 12 stitches of R30.
12 SC through both pieces. This will sew in the Bong Top. Sew in the tail of the Bong Top.
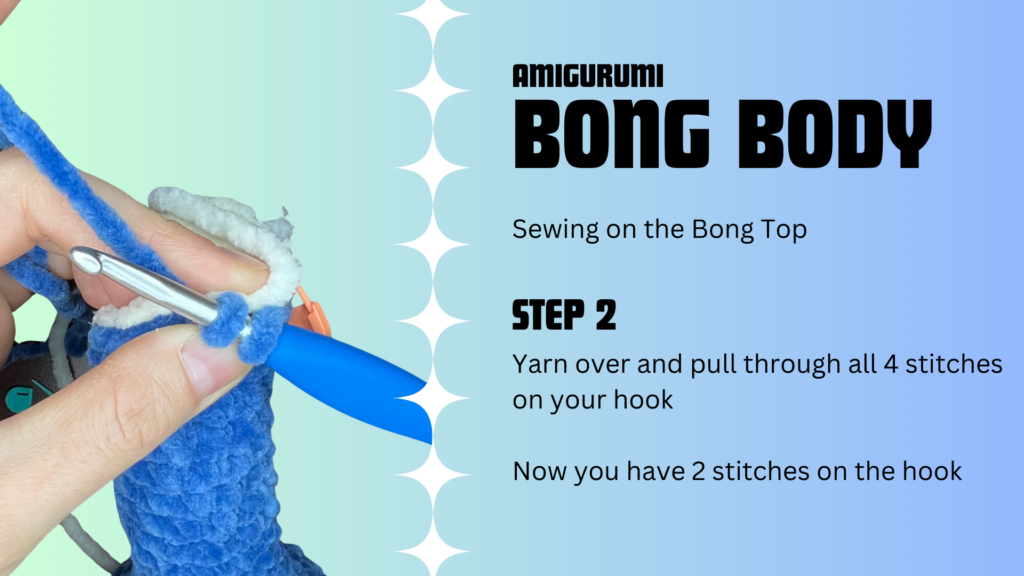
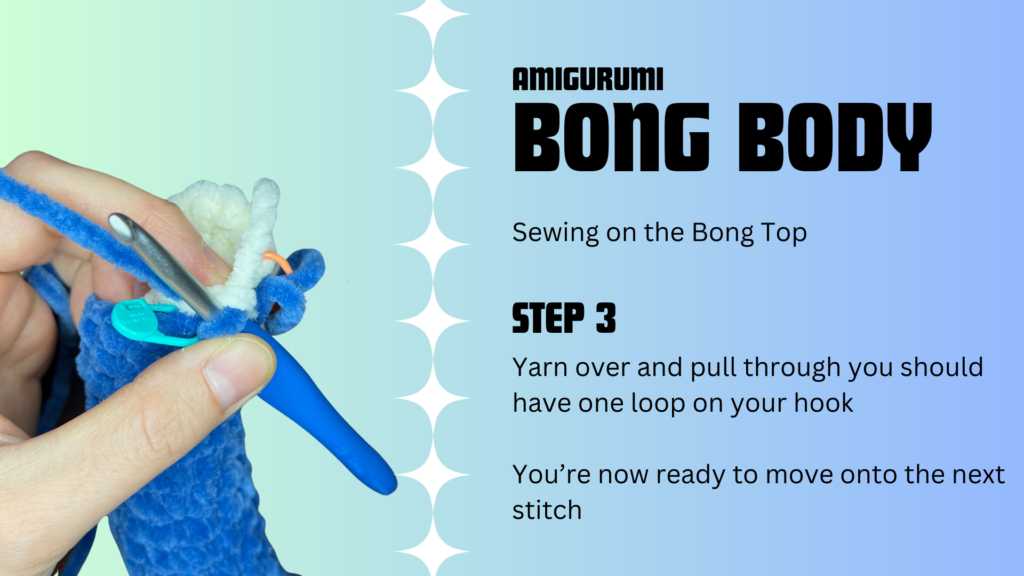
R32: SC 12 (12)
Finish off and weave in the tail.
Constructing Your Crochet Project
Attach the Bowl
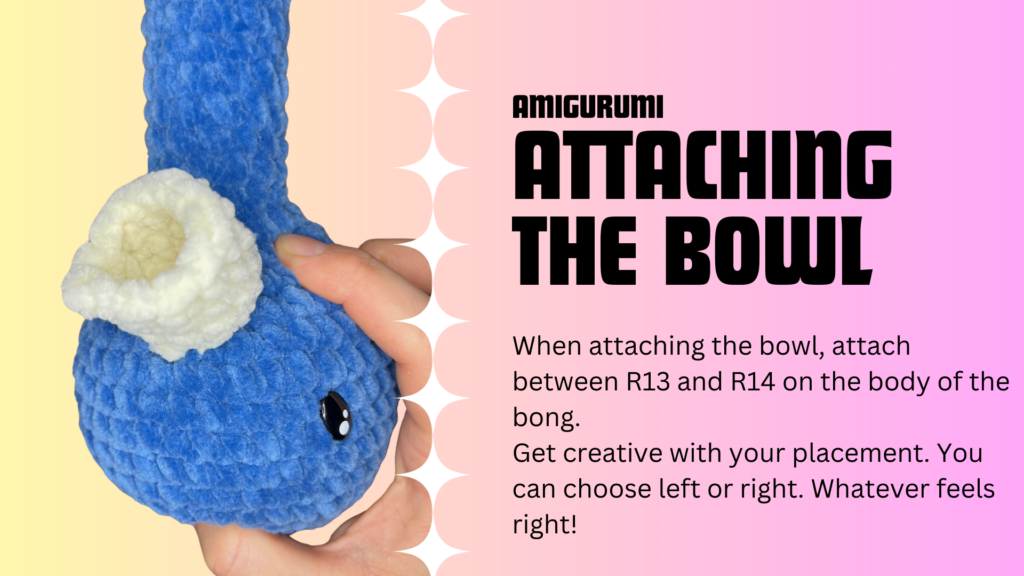
When attaching the bowl, attach between R13 and R14 on the body of the bong. Get creative with your placement. You can choose left or right. Whatever feels right!
Sewing on a Mouth
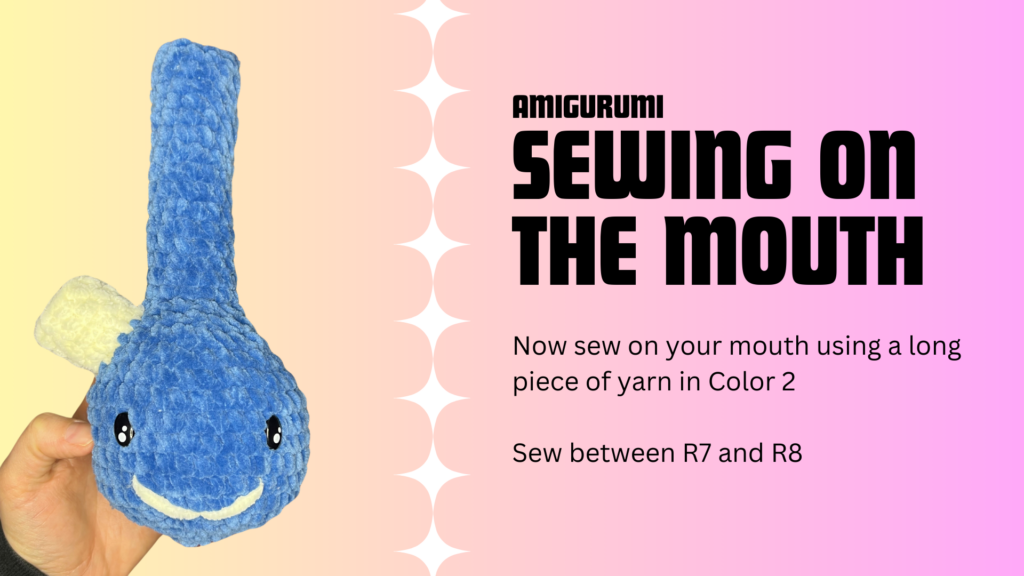
Now sew on your mouth using a long piece of yarn in Color 2. Sew between R7 and R8.

